> For the complete documentation index, see [llms.txt](https://help.aristotlemetadata.com/llms.txt). Markdown versions of documentation pages are available by appending `.md` to page URLs; this page is available as [Markdown](https://help.aristotlemetadata.com/collaborating-within-the-registry/how-to-add-content-to-workgroups.md).

# How to add content to workgroups

### **From Sandbox** <a href="#from_sandbox" id="from_sandbox"></a>

#### An individual item from your Sandbox <a href="#an_individual_item_from_your_sandbox" id="an_individual_item_from_your_sandbox"></a>

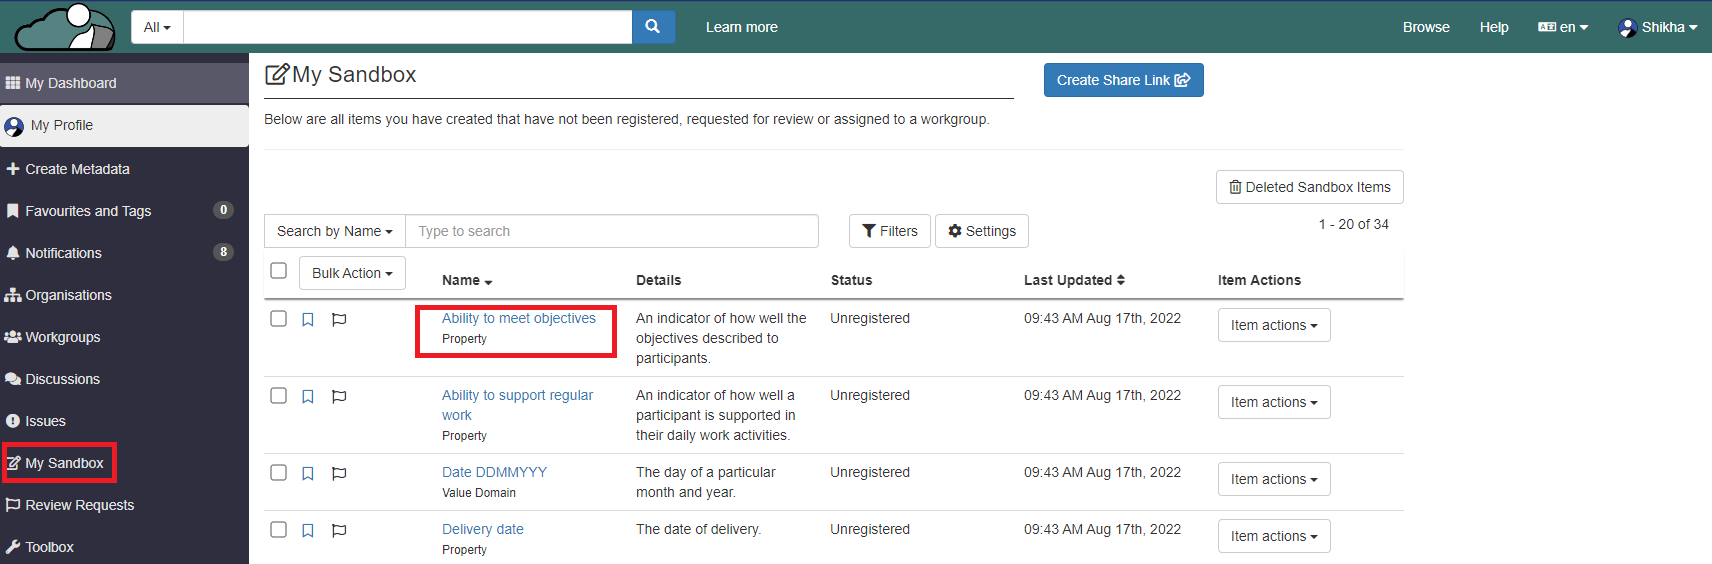
1. Go to "My Sandbox". Click on the metadata where you want to add the workgroup.

<figure><img src="/files/QKKLLX74tltP1b5P8WXy" alt=""><figcaption></figcaption></figure>

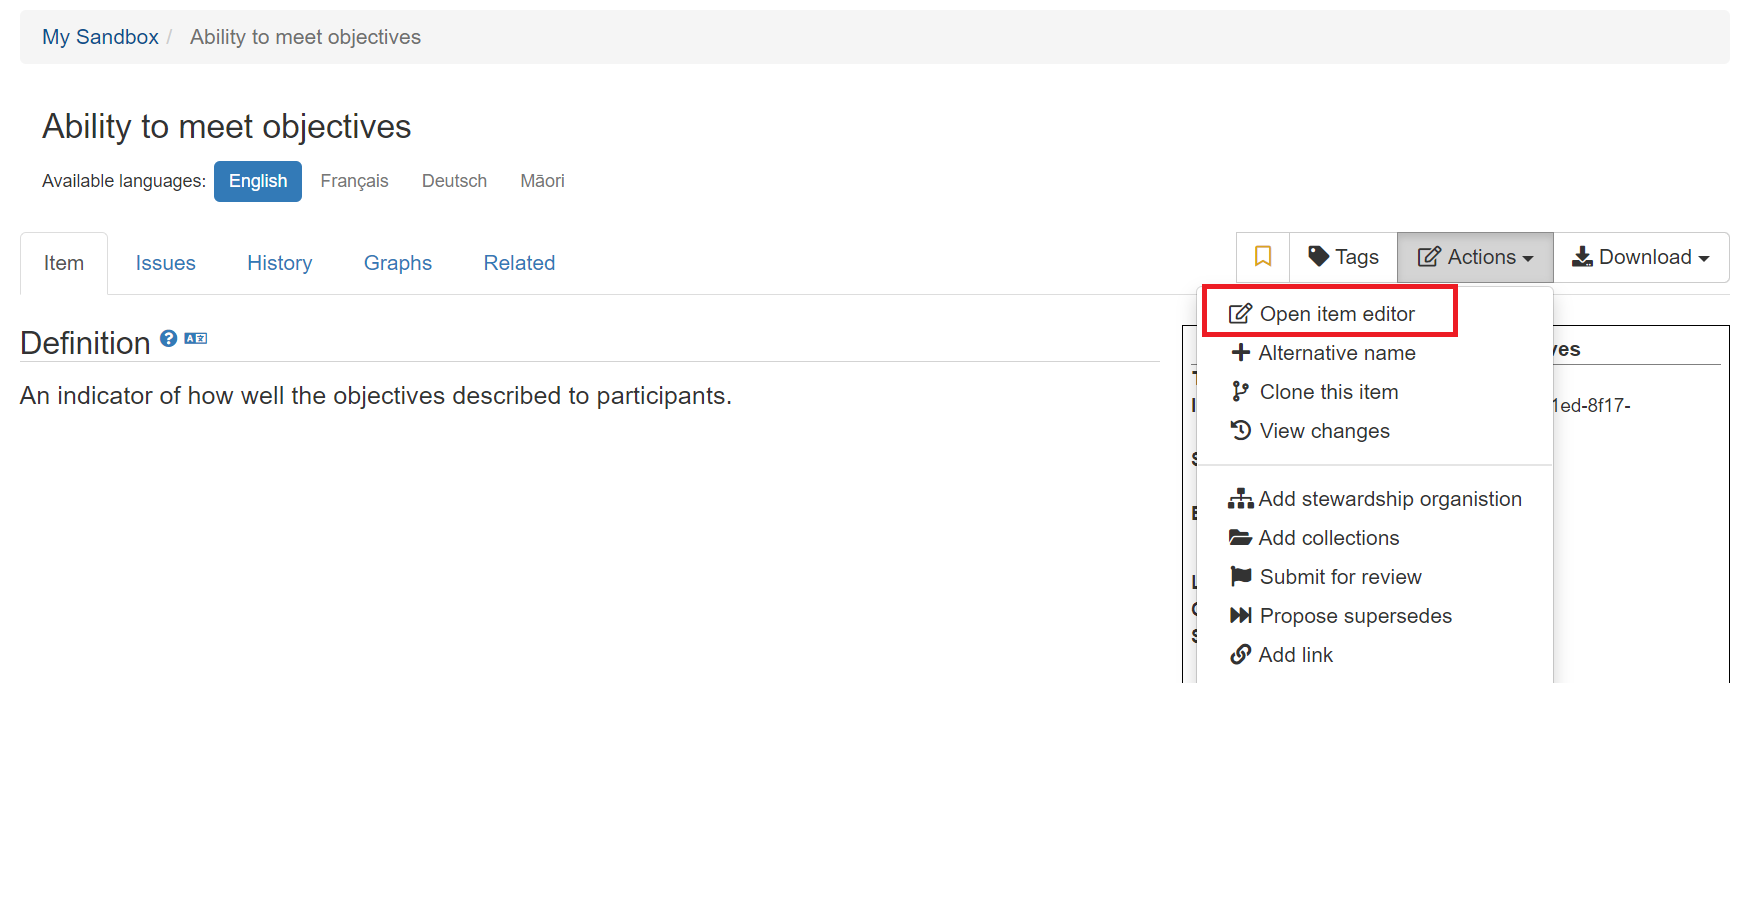
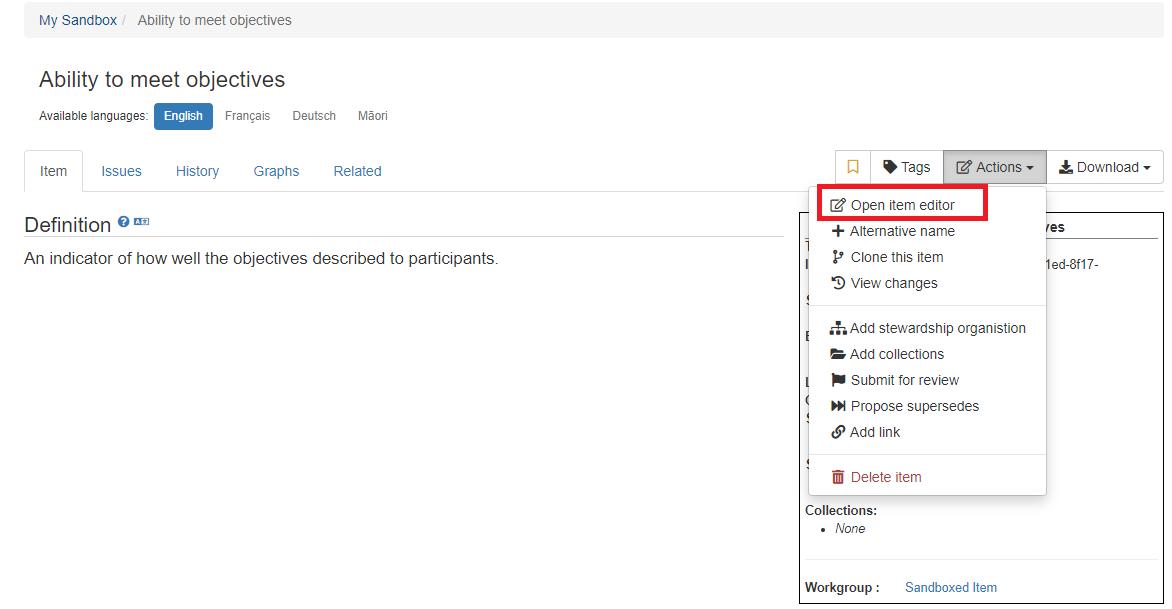
2\. Click on Actions dropdown, then click on  open item editor.

<figure><img src="/files/InECTenWHgvx8G64aStv" alt=""><figcaption></figcaption></figure>

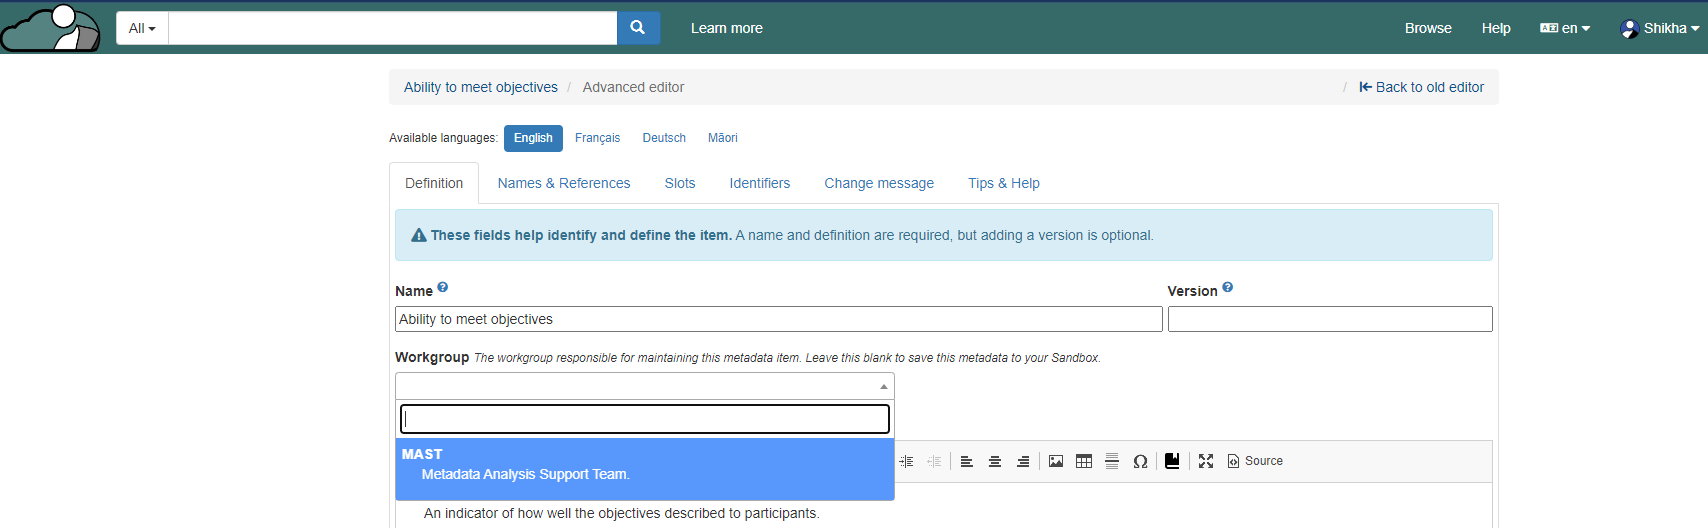
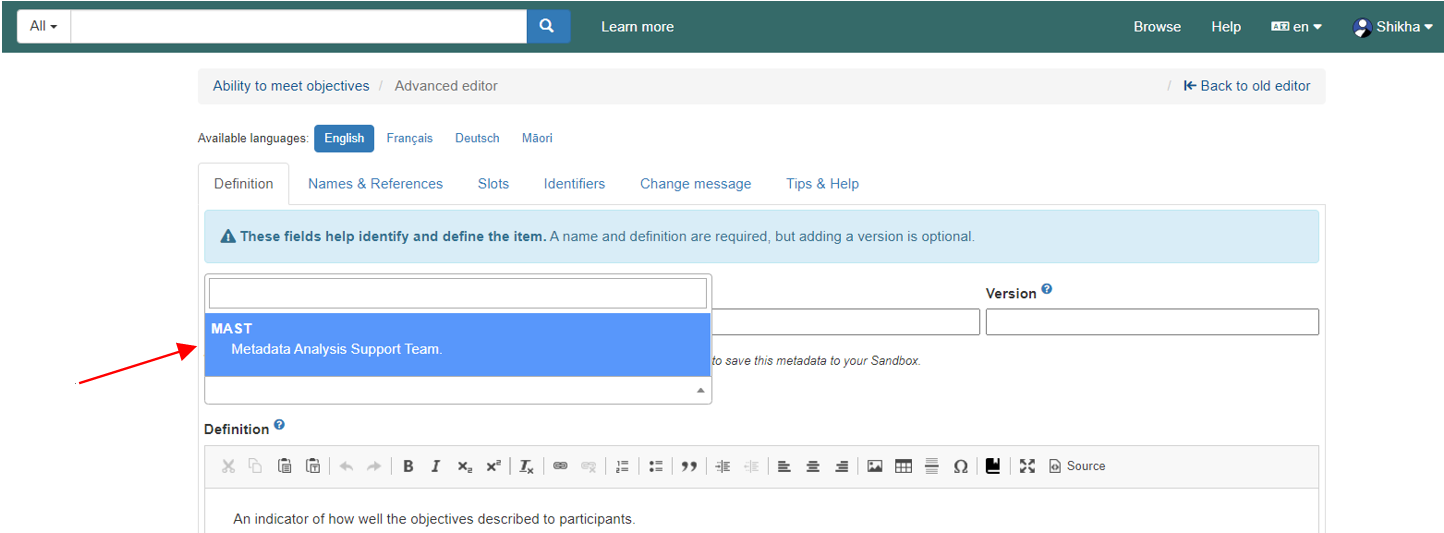
3\. To add an individual item to a Workgroup, select the Workgroup you would like to move this item to.&#x20;

<figure><img src="/files/fCehZZhzHWKRoTQTj0CZ" alt=""><figcaption></figcaption></figure>

4\. Select <img src="https://desk.zoho.com.au/DocsDisplay?zgId=7000211905&#x26;mode=inline&#x26;blockId=qdj7wecdb34b700784365aaa7cbb13cb36d14" alt="" data-size="line"> and the item will now be available in the selected Workgroup.

### Multiple items to a single Workgroup from your Sandbox

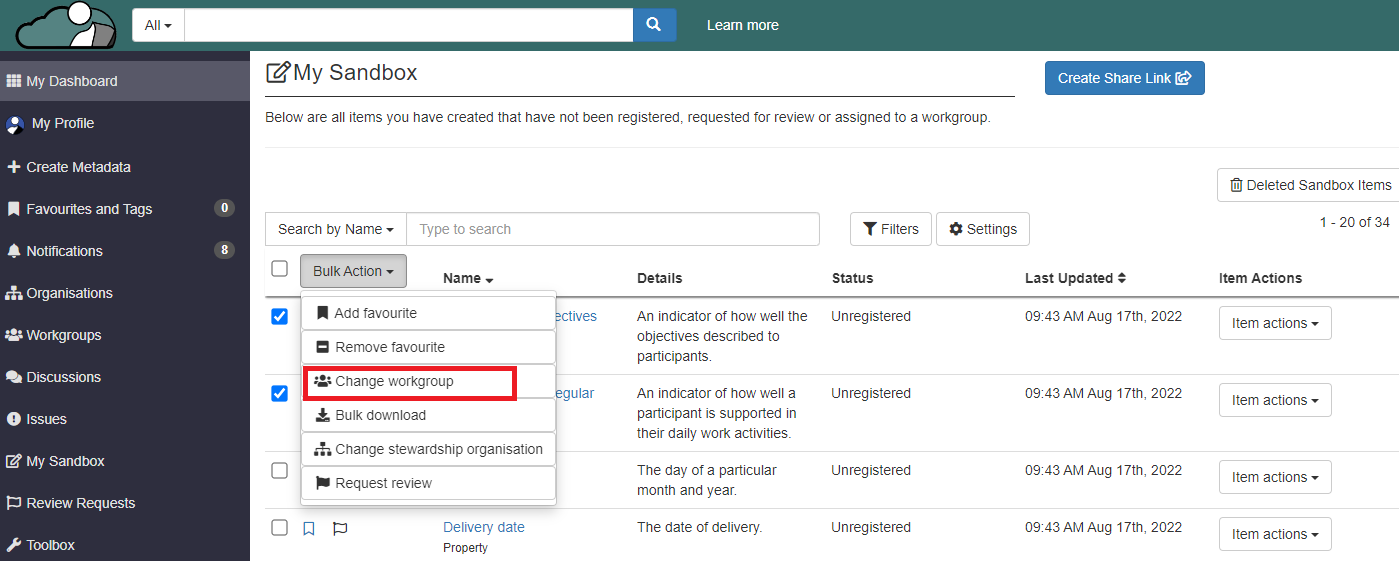
1. Select the tick box next to the items you would like to add. Once you've selected the items, select the <img src="https://desk.zoho.com.au/DocsDisplay?zgId=7000211905&#x26;mode=inline&#x26;blockId=qdj7web0831dc3754408ca494989eb6a0013c" alt="" data-size="line"> dropdown and then <img src="https://desk.zoho.com.au/DocsDisplay?zgId=7000211905&#x26;mode=inline&#x26;blockId=qdj7w298265fbb4344a048ac3a9a0a32d1de8" alt="" data-size="line">

<figure><img src="/files/JXp6Jp0KWBon8R8ojg0J" alt=""><figcaption></figcaption></figure>

2\. Fill in what Workgroup you want to move the items to.

<figure><img src="/files/Des11rfLrRHNh7Wdh5rK" alt=""><figcaption></figcaption></figure>

3\. Select <img src="https://desk.zoho.com.au/DocsDisplay?zgId=7000211905&#x26;mode=inline&#x26;blockId=qdj7wc249644e03464b4e976ee84339407055" alt="" data-size="line"> and the items will now be available in the selected Workgroup.&#x20;

### Change Workgroup&#x20;

How to change the Workgroup of an item that currently has a Workgroup

1. Go to the item page, click on the Actions dropdown and open item editor.

<figure><img src="/files/faTU8SFzIrzI5sDh2l3v" alt=""><figcaption></figcaption></figure>

2\. Under "Workgroup" select the Workgroup you would like to move this item to.

<figure><img src="/files/2u96JJZBIC6qRNw3HGF9" alt=""><figcaption></figcaption></figure>

3\. Once done, select <img src="https://desk.zoho.com.au/DocsDisplay?zgId=7000211905&#x26;mode=inline&#x26;blockId=qdj7w24b609f0265349a6893f9b3d09269500" alt="" data-size="line">and the item will now be available in the new Workgroup. \ <br>